As a part of the
exhibition I curated at the North Carolina Pottery Center (on display through March 2014) I included a section looking at kilns, kiln furniture, and how kilns were fired and stacked historically.
 |
| Layout for a cross-draft kiln, not using as much stacking because of the height of the arch on the kiln |
For the cross-draft kiln display I showed how pots were placed on quartz or other kinds of floor coverings, and then generally not stacked (sometimes they are) but able to stand from tallest to shortest depending on the height of the arch on the kiln. So the pots end up standing next to one another rather than stacked on top of one another.
 |
| Chester Webster jugs |
Two vessels attributed to Chester Webster of North Carolina in the 19th-century show how in a cross-draft kiln there is usually directional ash coverage on the pieces- meaning one side is coated with more ash than another because the side facing the firebox is more likely to be hit with ash and direct flame.
 |
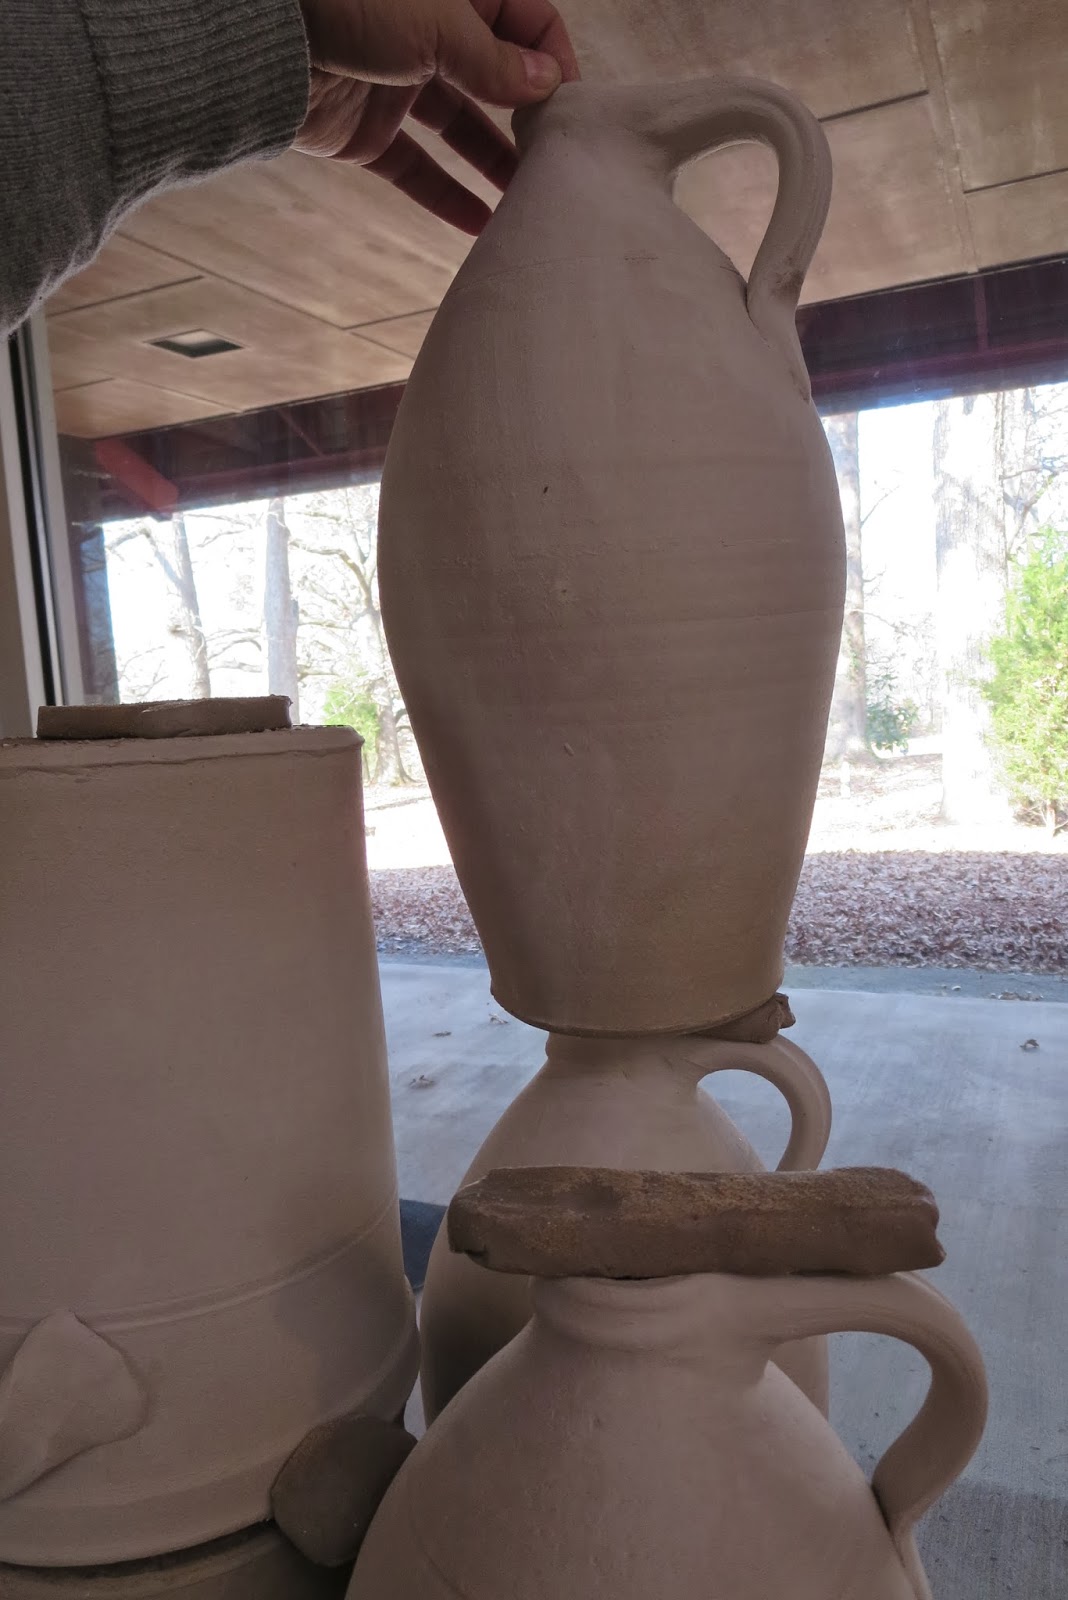
| Beginning of the updraft/downdraft stack |
Then I went to work on the updraft or downdraft kiln style, stacking the pots on top of one another with kiln furniture. I made the pots a few days before I installed so they were moderately dry. The kiln furniture was fairly damp and I let the bars set up before installing them so they wouldn't warp or collapse. My initial thoughts on loading historic kilns were that the vessels were still green or damp when loaded, and they were placed in the kiln as they were made and able to be loaded. I've read a few things about this being done in cross-draft kilns, but don't have concrete evidence of it being done in an updraft or downdraft kiln. I am rethinking things, and here's why:
 |
| Making bars |
 |
| Laying bars on the jugs |
Once the bars were set up, or lightly dried, I placed them on the tops of the jugs, and underneath of the jugs and used them on the rims and base of the straight-sided crocks. This was based on pieces of pottery I saw with marks from the bars and archaeological collections where this type of stacking was used,
such as the kiln site in Fayetteville, NC.
 |
| Placing spacers of different sizes |
 |
| And spacers of different shapes |
I placed spacers between the vessels to keep them from shifting onto one another. I sanded the ends of the pieces, and even put some glue on them since they will be there through March. I figured things were good to go- that the clay would all dry at about the same rate and that it would stay standing. Or, so I thought.
 |
| All stacked up! |
At least it stayed standing. Here is what I found when I returned less than one week later:
 |
| Separated kiln furniture and one piece that kept falling off |
 |
| Separated kiln furniture |
The furniture was not holding up so well. It was falling off, shifted, and had completely separated from the vessels! I am glad I tried this before doing this in my own kiln, but now it is back to the drawing board for thinking out placement and installation of the spacers and other pieces. It makes me wonder whether the historic pieces also separated like this, and maybe fell down, but that the slight separation created during the drying was overcome by the shifting and movement of the pieces during the firing. I will keep you posted!


6 comments:
Excellent experiment! I'm glad to see this type of information on furniture and the observations of how heat, flame and ash affect pots in kilns. Keep up the great work!
Thanks! It is really incredible to think about how the whole process impacts the pottery. I often think we focus so much on the final product, and look at the broad strokes of an intact historic piece, looking at the maker, marks, dates, etc.- but the true beauty is the manufacture and the stories that can tell us!
Wow! Really interesting stuff. Thanks for sharing your research!
Thanks, Lisa! What kind of kilns are you researching? Or just kiln firing in general?
thanks for this Info. These look just the ones used in The Norton Stoneware Kilns from Bennington VT. I've seen drawings, but it's better to see it recreated in real life pictures. I'm surprised I've found as much from this kiln as I have, as there's been several excavations over the years. I'm sure Hurricane Irene in 2011 washed up a lot.
Jim, I would be interested to see some of the ones from the Norton kilns- you've posted a few on the stoneware Facebook page, correct? If you e-mail me, I can send you a copy of an article I wrote last fall for the American Ceramic Circle Journal on my kiln furniture research and my thoughts on the various shapes, forms, and functions. Were there reports made on the excavations over the years? Thanks!
Post a Comment